Authors: V. Dimov, M.D., The Cleveland Clinic, B. Altaqi, M.D., Trover Foundation Health Care System
See the slide show or click on the images below for step-by-step instructions.
Indications
Pleural effusion which needs diagnostic work-up
Symptomatic treatment of a large pleural effusion
Contraindications
Uncooperative patient
Uncorrected bleeding diathesis
Chest wall cellulitis at the site of puncture
Relative contraindications
Bullous disease, e.g. emphysema
Positive end-expiratory pressure (PEEP) mechanical ventilation
Only one functioning lung
Small volume of fluid (less than 1 cm thickness on a lateral decubitus film)
Procedure Step-by-Step
Explain the procedure to the patient and obtain a written informed consent, if possible. Explain the risks, benefits and alternatives (RBA). Benefits may inlcude less SOB, obtaining a diagnosis, and risks may include pneumothorax, bleeding, or even death.
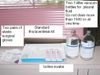
Fig. 1. Get the standard thoracocentesis kit. In addition to the kit, you will need two 1-liter vacuum bottles and Bethadine for cleaning the area. Prepare the necessary equipment for the pleural tap.
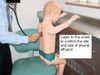
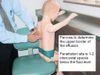
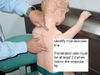
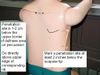
Fig. 2, 3, 4, 5. Find the anatomical landmarks before you perform the thoracocentesis.
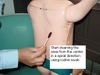
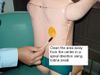
Fig. 6, 7. Clean the area with iodine.
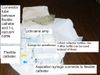

Fig. 8, 9. Open the kit and make sure that you know which tube and needle are used for.
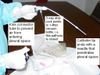
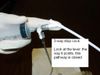
Fig. 10, 11. Practice sliding the flexible catheter.
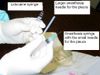
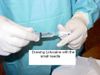
Fig. 12, 13. Prepare for local anesthesia.
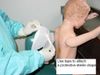
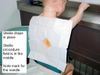
Fig. 14, 15. Prepare the area.

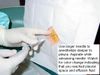

Fig. 16, 17, 18. Perform the procedure (under supervision, if you are not certified). Anesthetize the skin and pleura, try to reach the effusion fluid.
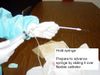
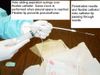
Fig. 19, 20. Prepare the flexible catheter.
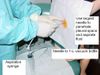


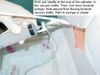
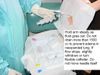
Fig. 21, 22, 23, 24, 25. Pass the flexible catheter over the tap needle into the pleural space and begin aspirating the fluid in the vacuum tubes.
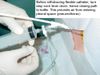
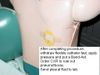
Fig. 26, 27.
Complete the procedure, check for complications - mainly pneumothorax and bleeding. Order a CXR to rule out pneumothorax.
Send the pleural fluid in the 1 L bottle to the laboratory. Compare the pleural fluid to the corresponding blood tests, in order to differentiate between transudate and exudate. If the patient had blood draws this morning, you can order some additional enzymes as AOT (add-on tests), if not already done before the tap.
Complications
Pneumothorax (3-30%)
Hemopneumothorax
Hemorrhage
Hypotension due to a vasovagal response
Pulmonary edema due to lung reexpansion
Spleen or liver puncture
Air embolism
Introduction of infection
Write a procedure note which documents the following:
Patient consent
Indications for the procedure
Relevant labs, e.g INR/PTT, platelet count
Procedure technique, sterile prep, anesthetic, amount of fluid obtained, character of fluid, estimated blood loss
Any complications
Tests ordered
References:
Procedure Skills and ACLS Refresher
Thoracentesis - The UCSF Hospitalist Handbook
Diagnostic Approach to Pleural Effusion in Adults. Am Fam Phys, Vol. 73 No. 5, April 1, 2006.
Patient information: Thoracentesis - Medline Plus
Patient information: Pleural effusion - Medline Plus
Is Ultrasound-Guided Thoracentesis Safer? - AFP
Thoracentesis Best Practices: Slideshow. Medscape, 2011.
See the slide show or click on the images below for step-by-step instructions.
Indications
Pleural effusion which needs diagnostic work-up
Symptomatic treatment of a large pleural effusion
Contraindications
Uncooperative patient
Uncorrected bleeding diathesis
Chest wall cellulitis at the site of puncture
Relative contraindications
Bullous disease, e.g. emphysema
Positive end-expiratory pressure (PEEP) mechanical ventilation
Only one functioning lung
Small volume of fluid (less than 1 cm thickness on a lateral decubitus film)
Procedure Step-by-Step
Explain the procedure to the patient and obtain a written informed consent, if possible. Explain the risks, benefits and alternatives (RBA). Benefits may inlcude less SOB, obtaining a diagnosis, and risks may include pneumothorax, bleeding, or even death.
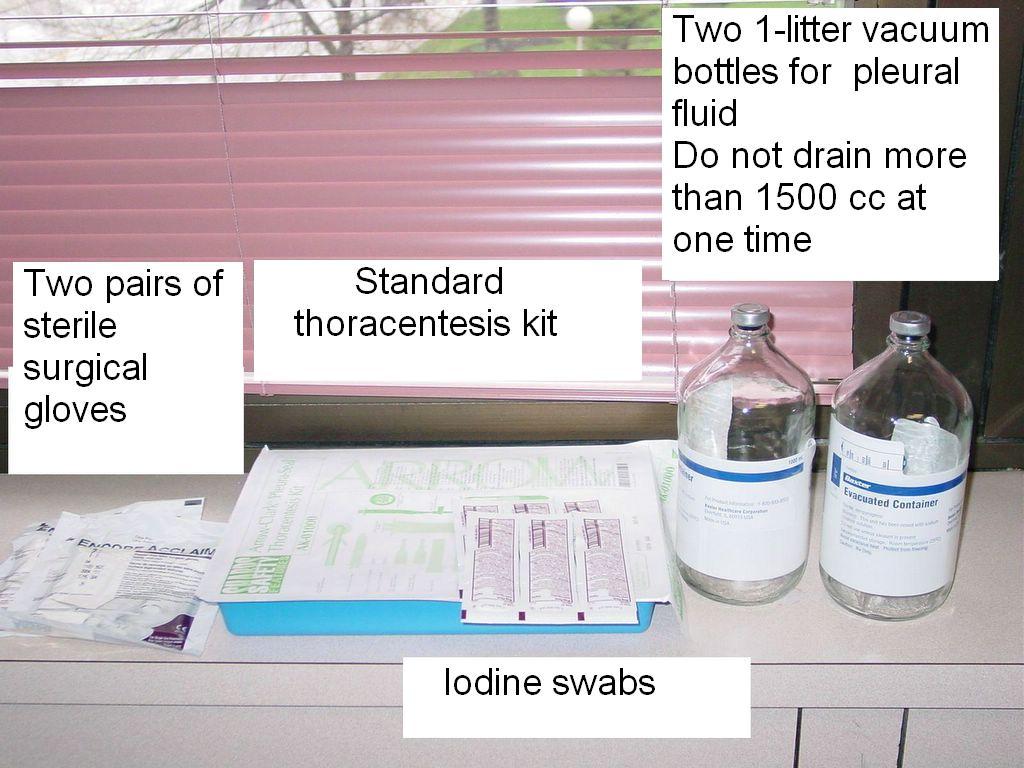
Fig. 1. Get the standard thoracocentesis kit. In addition to the kit, you will need two 1-liter vacuum bottles and Bethadine for cleaning the area. Prepare the necessary equipment for the pleural tap.

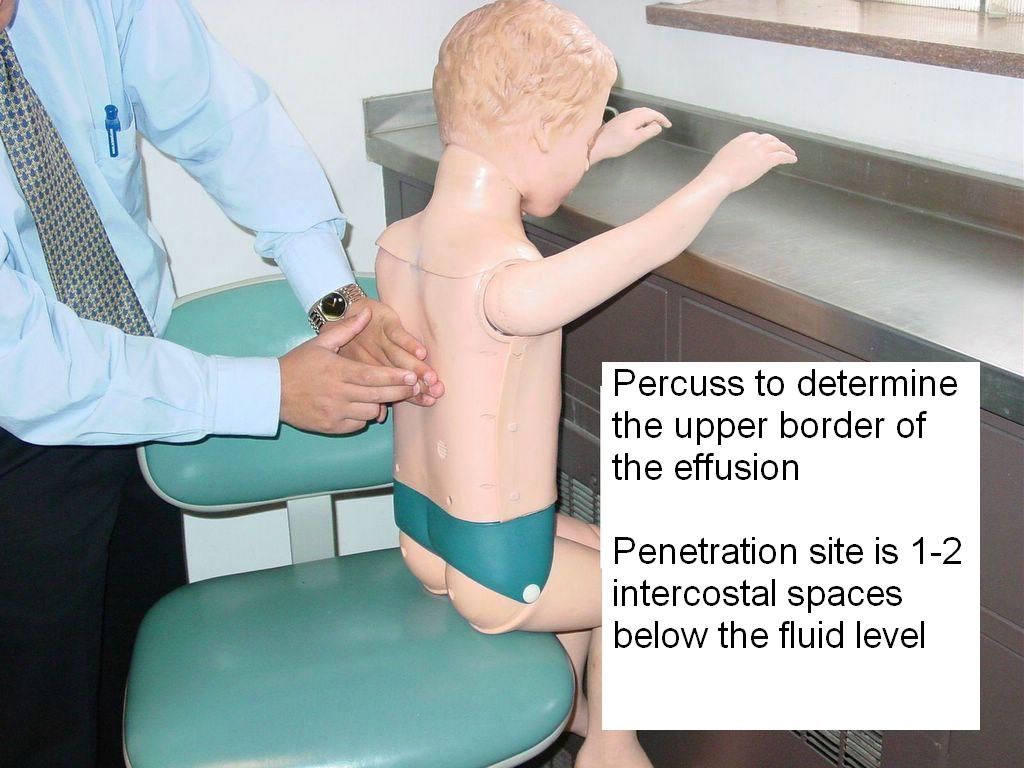

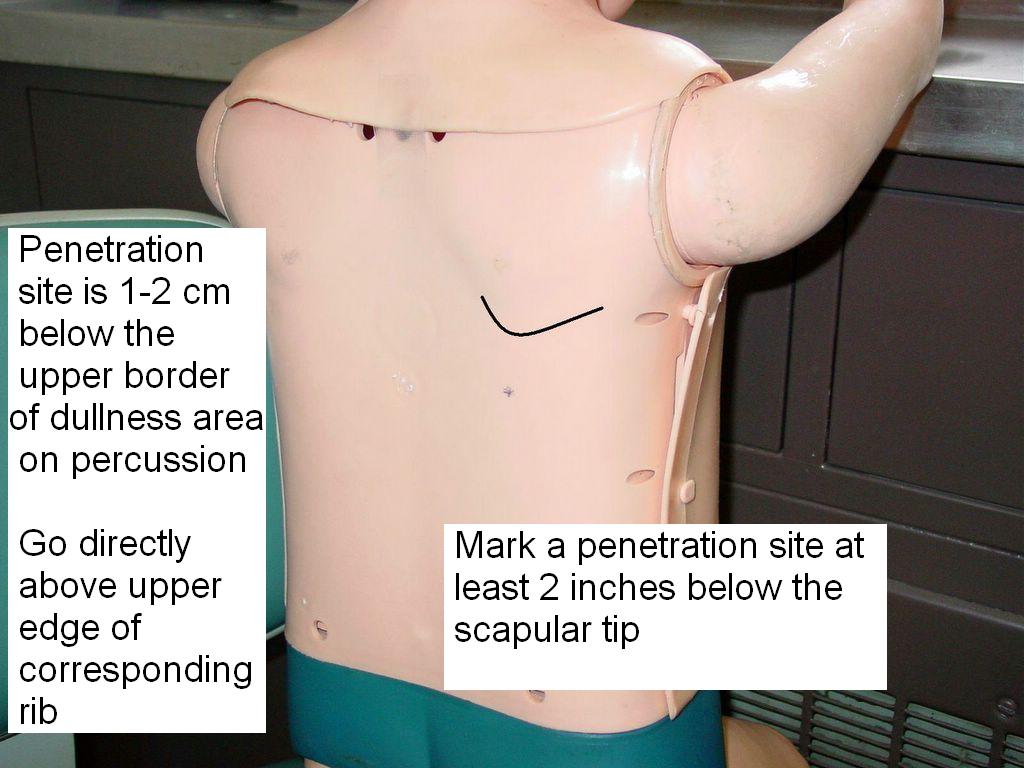
Fig. 2, 3, 4, 5. Find the anatomical landmarks before you perform the thoracocentesis.


Fig. 6, 7. Clean the area with iodine.
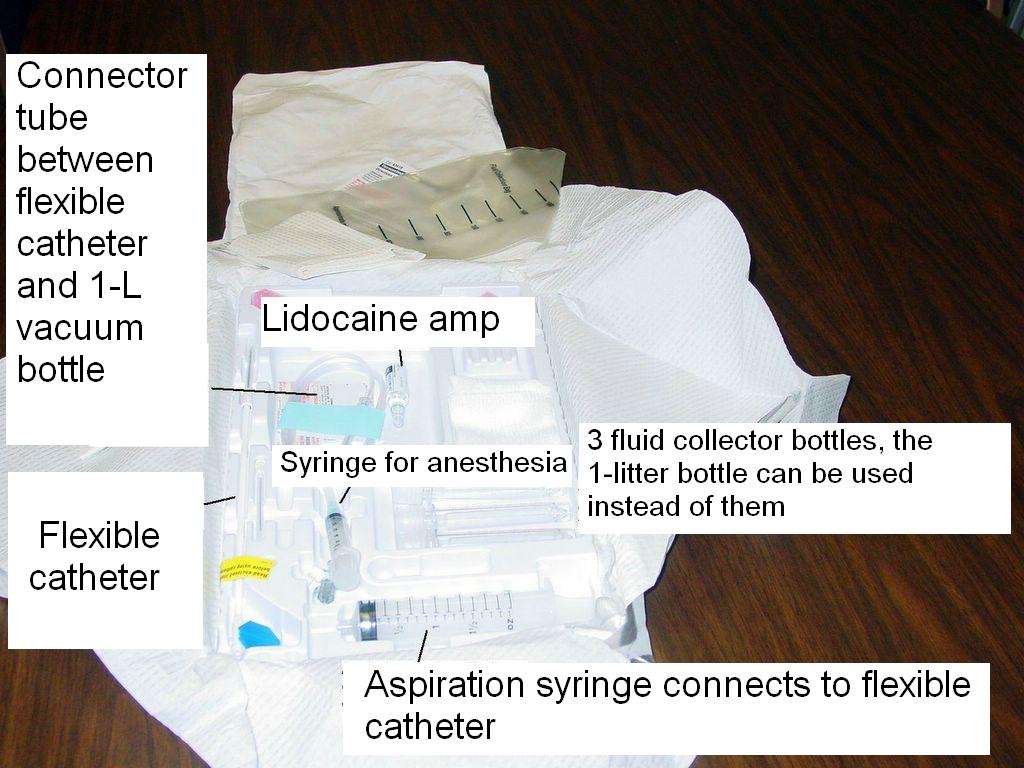

Fig. 8, 9. Open the kit and make sure that you know which tube and needle are used for.


Fig. 10, 11. Practice sliding the flexible catheter.


Fig. 12, 13. Prepare for local anesthesia.


Fig. 14, 15. Prepare the area.
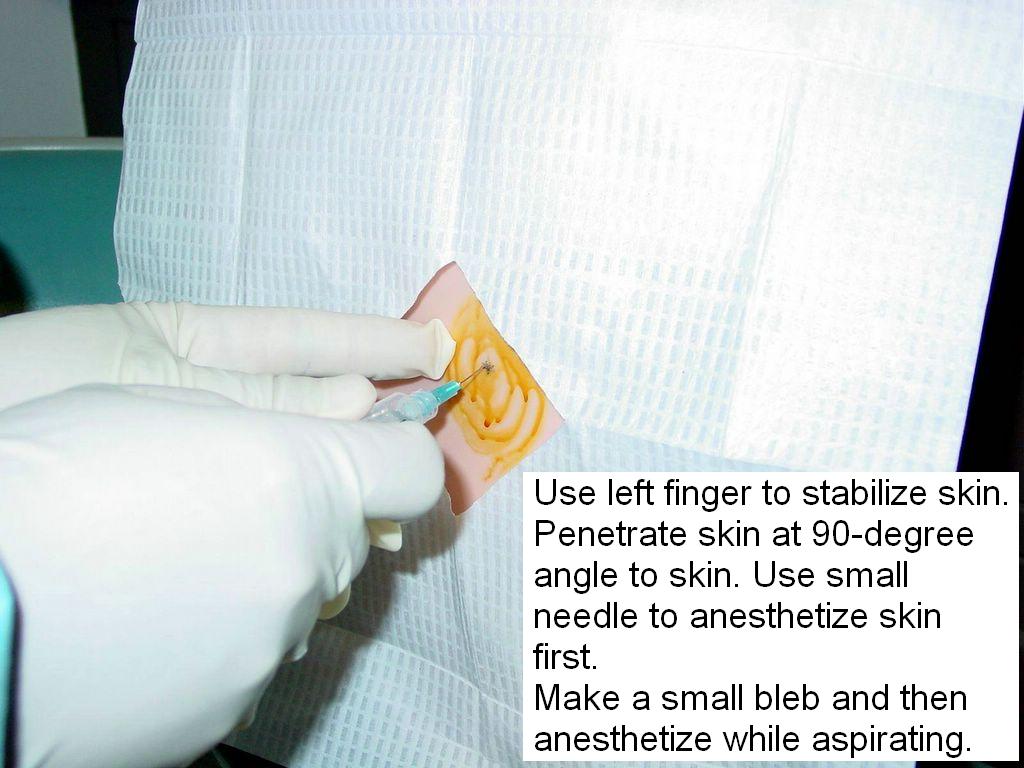

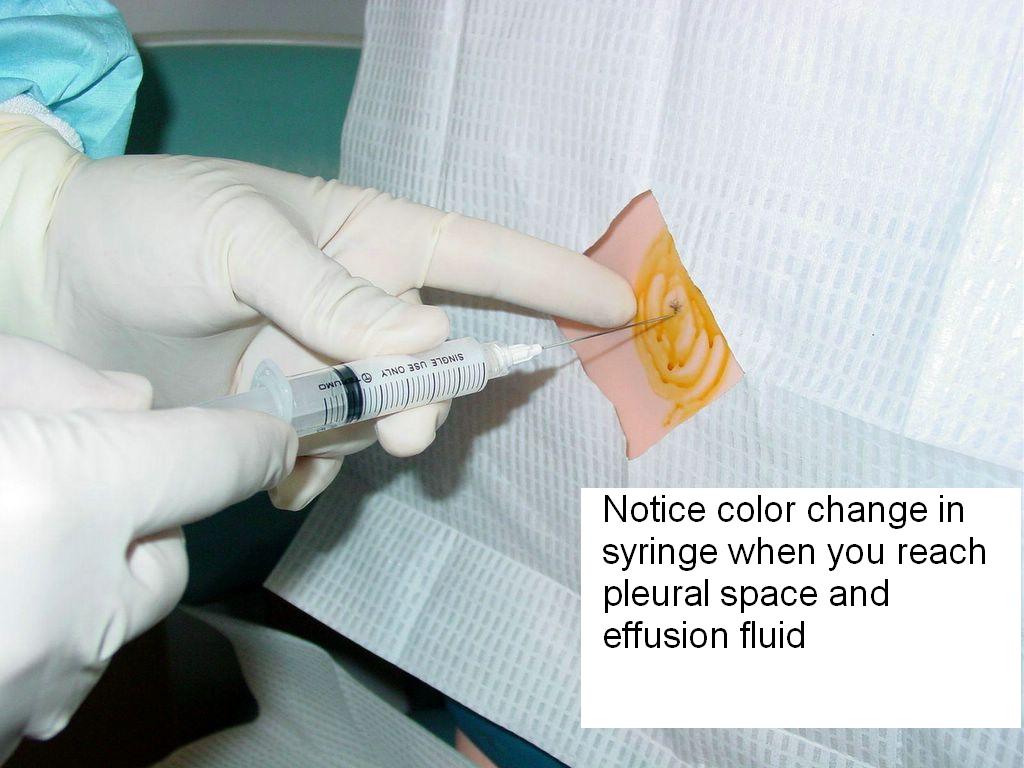
Fig. 16, 17, 18. Perform the procedure (under supervision, if you are not certified). Anesthetize the skin and pleura, try to reach the effusion fluid.
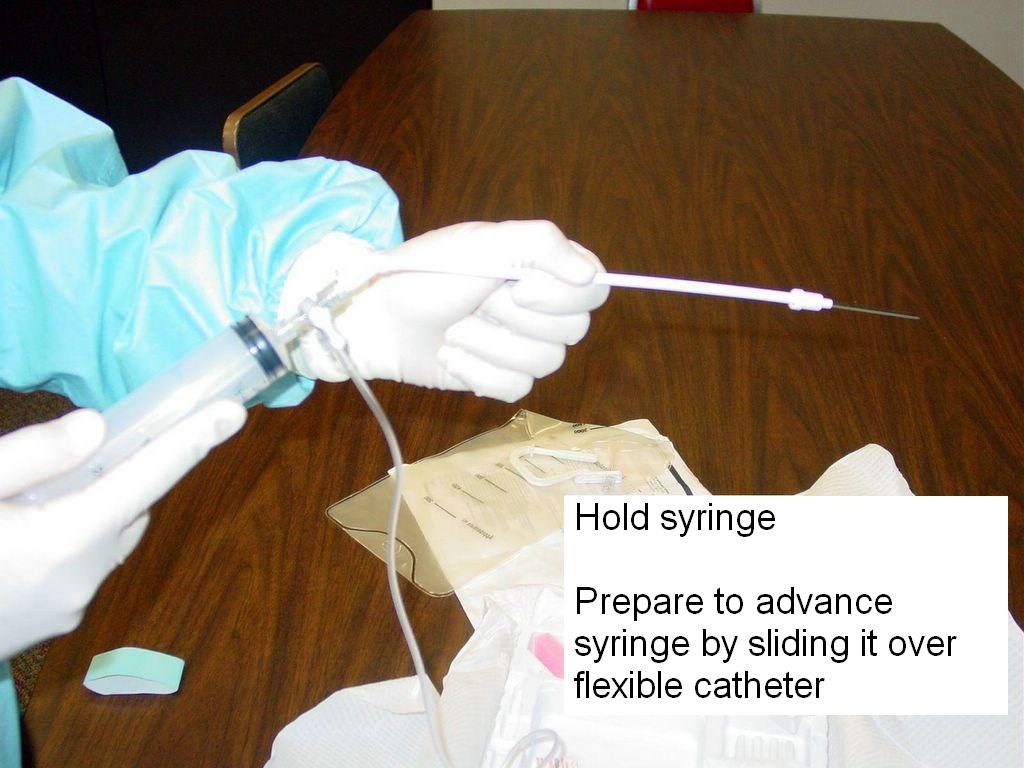

Fig. 19, 20. Prepare the flexible catheter.
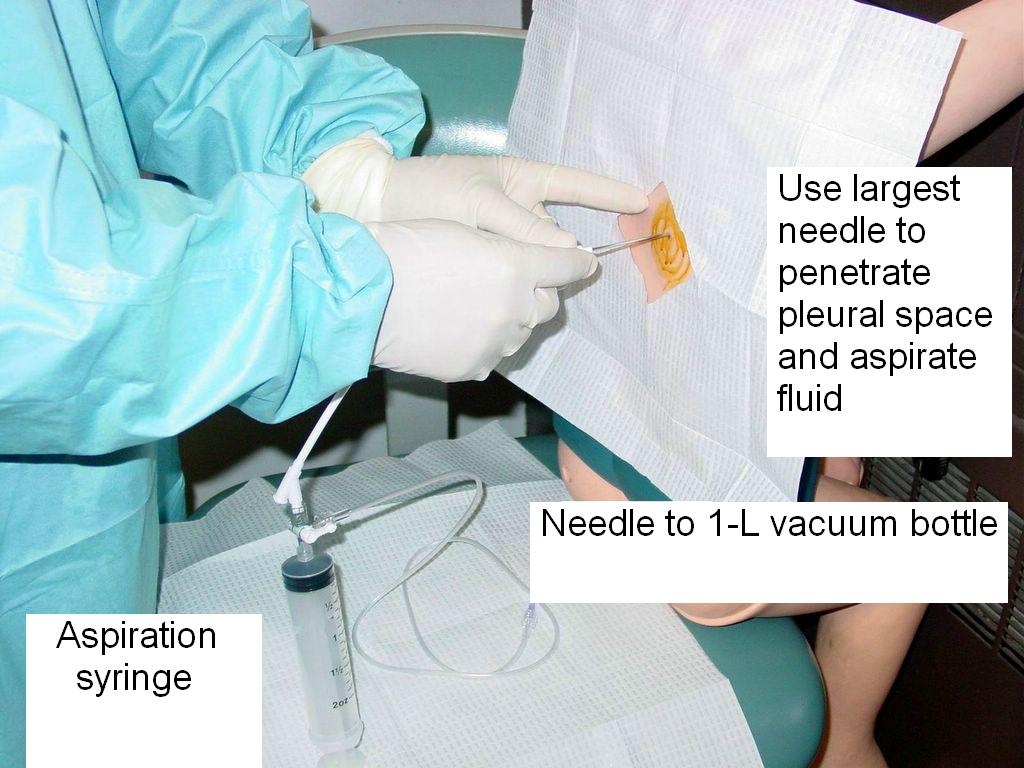
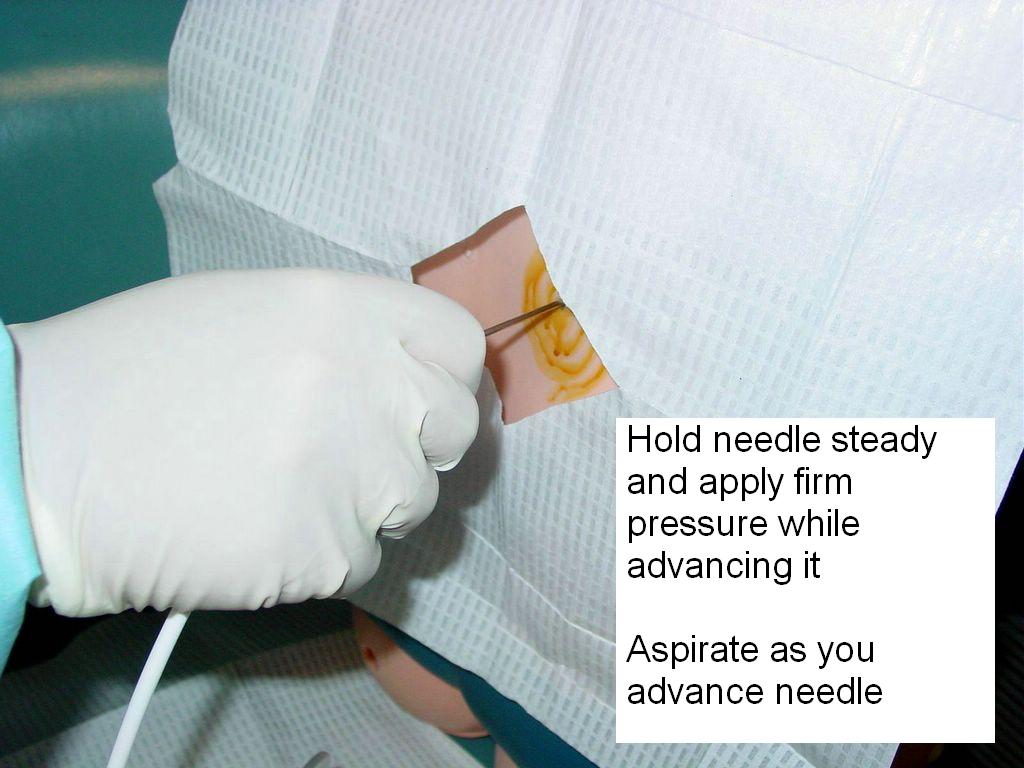
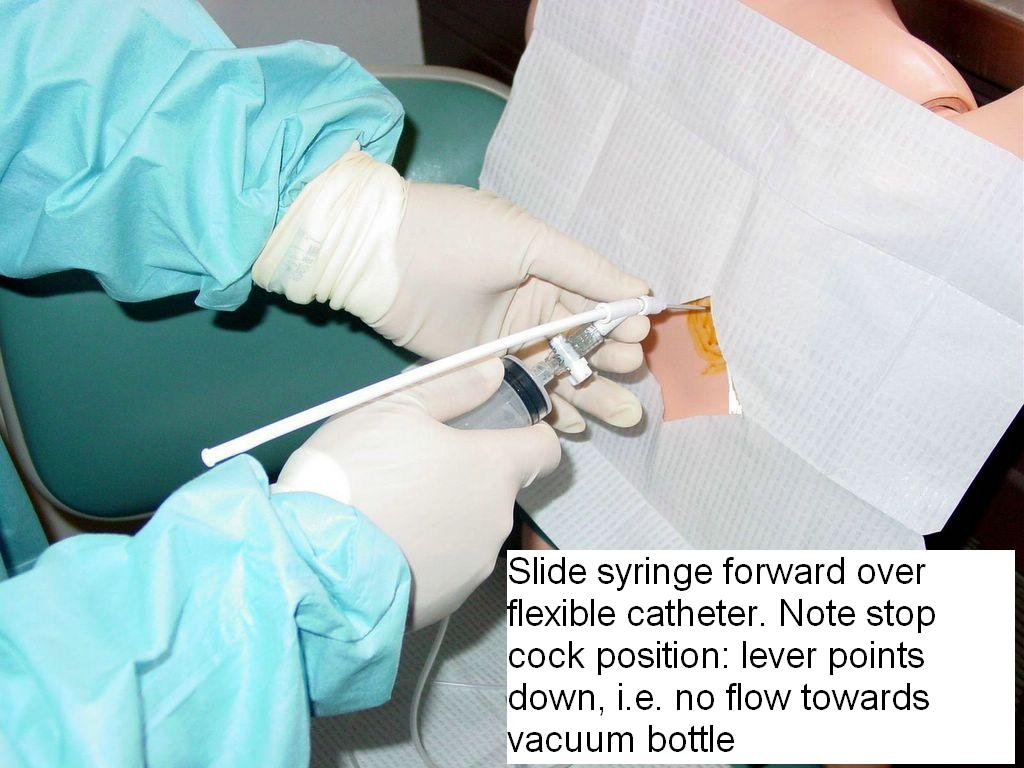

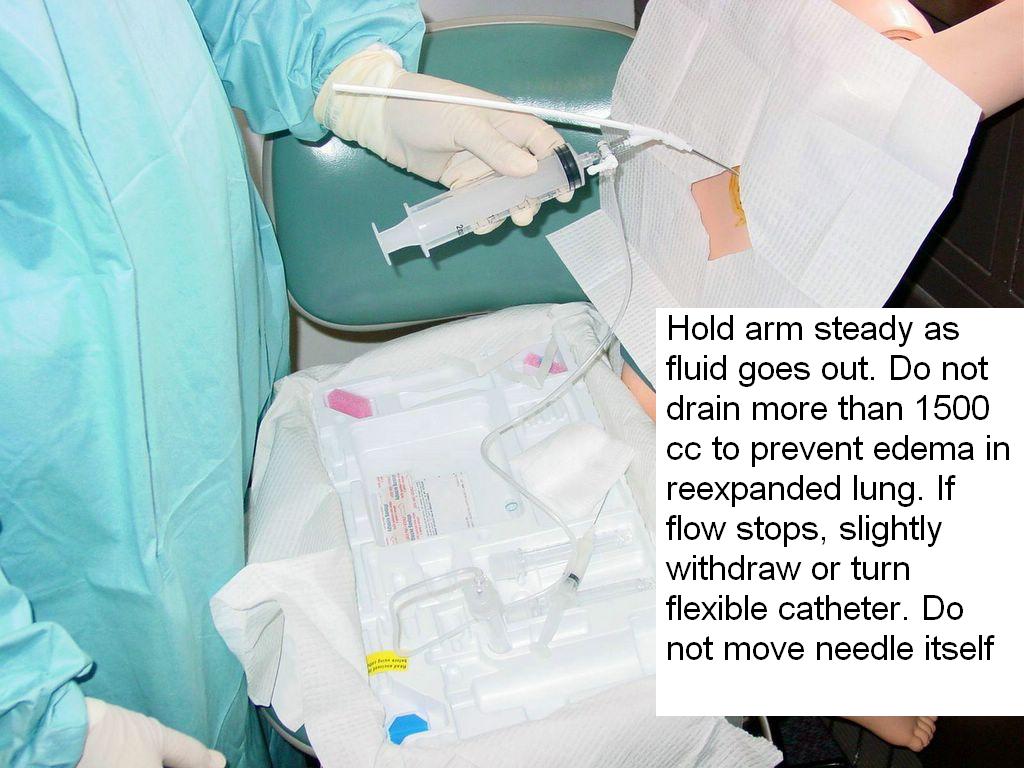
Fig. 21, 22, 23, 24, 25. Pass the flexible catheter over the tap needle into the pleural space and begin aspirating the fluid in the vacuum tubes.

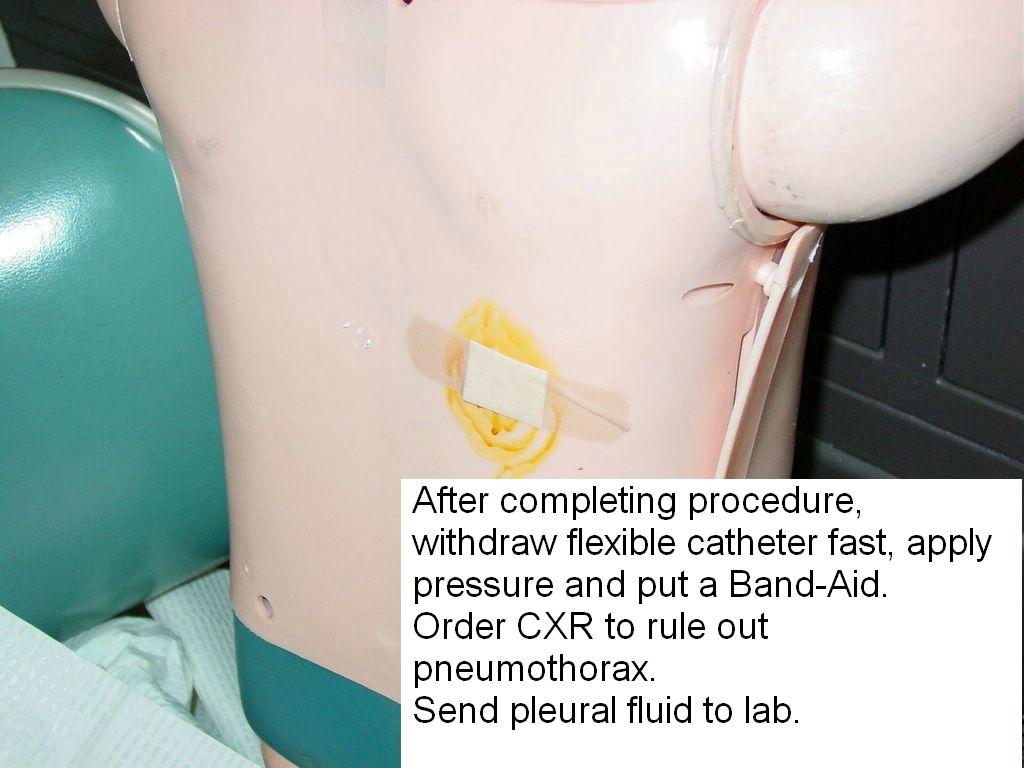
Fig. 26, 27.
Complete the procedure, check for complications - mainly pneumothorax and bleeding. Order a CXR to rule out pneumothorax.
Send the pleural fluid in the 1 L bottle to the laboratory. Compare the pleural fluid to the corresponding blood tests, in order to differentiate between transudate and exudate. If the patient had blood draws this morning, you can order some additional enzymes as AOT (add-on tests), if not already done before the tap.
Complications
Pneumothorax (3-30%)
Hemopneumothorax
Hemorrhage
Hypotension due to a vasovagal response
Pulmonary edema due to lung reexpansion
Spleen or liver puncture
Air embolism
Introduction of infection
Write a procedure note which documents the following:
Patient consent
Indications for the procedure
Relevant labs, e.g INR/PTT, platelet count
Procedure technique, sterile prep, anesthetic, amount of fluid obtained, character of fluid, estimated blood loss
Any complications
Tests ordered
References:
Procedure Skills and ACLS Refresher
Thoracentesis - The UCSF Hospitalist Handbook
Diagnostic Approach to Pleural Effusion in Adults. Am Fam Phys, Vol. 73 No. 5, April 1, 2006.
Patient information: Thoracentesis - Medline Plus
Patient information: Pleural effusion - Medline Plus
Is Ultrasound-Guided Thoracentesis Safer? - AFP
Thoracentesis Best Practices: Slideshow. Medscape, 2011.